Following are a few camera accessories for my Nikon D90 which I bought out of China.
These are low cost alternatives (clones) of the high priced items offered by those who I won't name. Safe to say these company's are well known, BIG, corporate wide and they certainly don't need me to do their advertising for them. If they do they can send some of that advertising dollar my way ...
However as said in the Latin caveat emptor or in plane English 'buyer beware' because we get what we pay for. And being the sneaky 'snake oil' promoters they are, they do make them look great on paper.
Aputure Timer Remote
... This product works as it should therefor I can say I'm happy with this item.
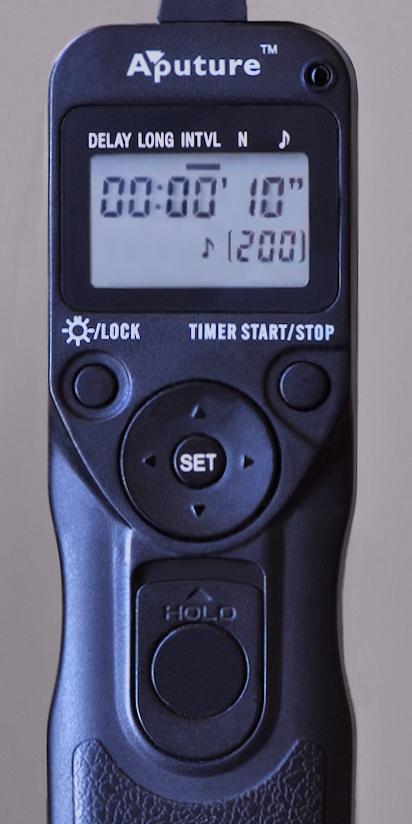 |
| Aputure Timer Remote |
Aputure Digital LCD Timer Remote for Nikon D90
 |
The Aputure Gigtube Wireless Viewfinder
for Nikon D90 displaying the Nikon D90 and it's Info Screen. |
Yes the viewfinder also works in Live View however the screen's resolution leaves allot to be desired even though it's tad larger than the D90's high-res display. As for functionality the only camera control on the remote is the Shutter Release.
In all honesty I can't say this particular wireless display is the equal of the on camera display, it's certainly not. With it's sub par screen giving less resolution than desirable the more concerning was it's RF Interference. To help reduce said interference I added another Ferrite Bead which did help reduce the screen noise. Nevertheless the viewfinder is usable out to about 15 feet before the Interference becomes a serious issue and almost unviewable. Close to the camera baring the less than perfect screen resolution it works well but the RF Interference increases in intensity the more distance I put between it's receiver and transmitter.
Now apparently Aputure are offering a new version of this viewfinder which they are calling the Gigtube Wireless II. And for added-value this Gigtube has a small camera built into it's transmitter. In theory at least their newest version should offer a better viewing experience as they have improved upon the viewfinder's screen. But again this info came by way of their marketing material and believing in "that" is what got me into trouble with Aputure's first version ... Ergo caveat emptor, again!
As for this version I feel it's one of those products where 'buyers remorse' would aptly describe my feelings after un-boxing and trying it for the first time. The excitement I felt during the un-boxing quickly dissipated after trying it for the first time.
It's my opinion Aputure went too "cheap" with it's display screen. The viewfinder on whole was usable assuming you don't mind a little RF interference however the image presented was very, VERY disappointing! Being only VGA (?) this viewfinder certainly would have benefited by more resolution, maybe a screen to match the high-res displays found in just about every modern DSLR?
A side note: I did voice my concerns about this 'Viewfinder' on the retailers 'User-Review' page and found they are censoring ALL negative comments for this products and for many other products also. I guess I shouldn't have been surprised but I couldn't and didn't TRUST any of user-reviews found on this particular retailer's site who's name I refuse to mention. In my defense I must say I was being as polite and professional as I could be, more so than here only because I didn't want my comments dismissed due to poor behavior on my part. Regardless my review never saw the light of day, so I'm saying it here ...
 |
Receiver and Connections. Notice the open Ferrite Bead which I added thinking it might help cut down the interference. It did help in so much as I got a little more range before the screen became unviewable.
|
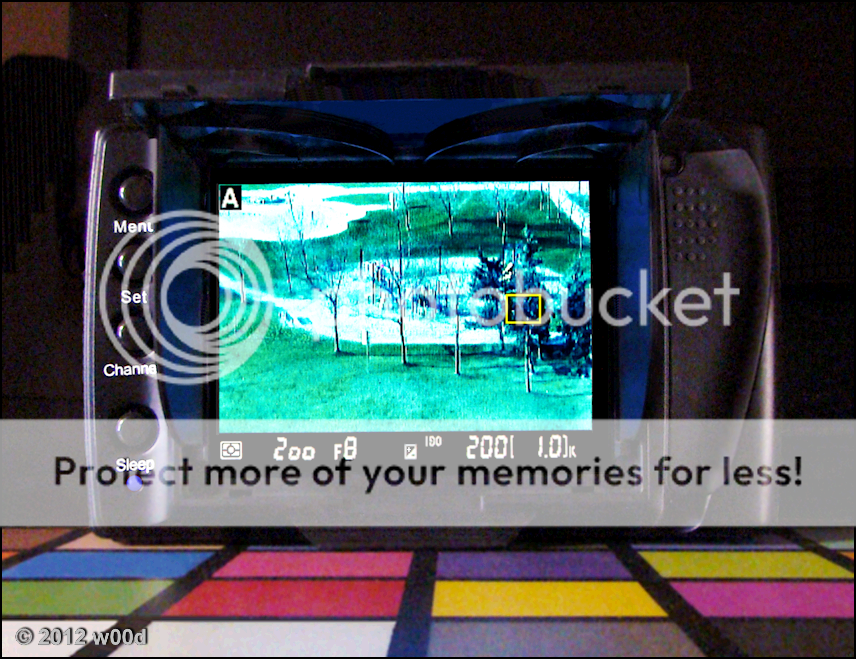 |
The receiver with the removable SUN Screen currently displaying the D90's Live View but don't judge the device by this image. This image was modified using my photo-editor and I made it look much better than it really was. Yes, you can laugh now!
|
 |
The Transmitter showing channel 4
of four available channels.
|


 rechargeable batteries")